
Table of Contents:
In today’s post, I want to talk about resource locks. I’ll discuss what they are, how to use them, and how to get visibility into when they’re being triggered. Let’s get started!
What is a Resource Lock?
To understand what a resource lock is, first we need to understand what a resource is. A resource is what we call any service created or consumed within Microsoft Azure, examples would be an Azure Storage Account, or an Azure Virtual Machine. Even IP addresses are resources!
To protect our resources from being accidentally deleted or modified, we can create a ‘Resource Lock’. There are two types of resource locks.
Delete Lock
A Delete Lock, also known as ‘CanNotDelete’ within the command line, allows reading and modifying a resource, but preventing deletion of the resource. Note that this only covers the resource itself, not its contents. If I created a delete lock onto an Azure Storage Account, I could still delete the data within the account, just not the account itself.
Read-Only
A read-only Resource Lock is used to prevent deletions or modifications to a resource. This only relates to the Azure configuration of a resource, and not the contents, a Read-Only lock on a virtual machine wouldn’t prevent it from saving data to disk for example but would prevent reconfiguration of the virtual machine.
What do I need to know about a Resource Lock?
Inheritance
Resource locks can be applied directly to resources, but that’s not the only way they can be used. Resource locks can also be applied to resource groups, or even to subscriptions, with the resource lock configuration inherited by any resources within the scope. When multiple locks are inherited, the most restrictive lock is the lock that takes precedence. This means the read-only resource lock would supersede a delete lock.
A potentially unexpected side-effect of inheritance is that downstream resource locks can impact upstream operations. For example, if you tried to delete a subscription that did not have a resource lock, within which was a resource group that did not have a resource lock, within which was a resource that had a delete lock, the entire deletion would fail. This means that no resources or resource groups would be deleted within the subscription, as a partial delete is not permitted within Azure.
Unexpected Considerations
Using either a delete lock or a read-only lock can cause unintentional behaviour if you haven’t read the Microsoft documentation, examples include a read-only lock on a virtual machine would prevent users from starting a virtual machine or restarting the virtual machine from Azure (guest OS level reboots would continue to work). Be sure to validate if there are known considerations regarding your Azure resource type before applying a resource lock to them. The Microsoft documentation for which can be found here.
Resource Lock vs Role-Based Access Control
Additionally, I want to highlight that resource locks aren’t like a typical role-based access control, the resource lock applies to all users and roles equally. These resource locks must be removed prior to triggering any behaviours that are blocked by the resource lock, even if you’re the resource owner!
Preventing Resource Lock Removal
The only default roles that can add/modify/remove resource locks are Owner and User Access Administrator, if you’re working with custom roles then the following permissions are required:
Microsoft.Authorization/*
Microsoft.Authorization/locks/*
This becomes an important consideration when you choose where within your scope, you wish to enforce locks. If you had a sensitive subscription, such as for your backups, you might choose to enforce the resource lock at the subscription level, with only a few necessary Owner accounts. You would then create your resource group(s) within which you can provide the relevant permissions for your colleagues to perform their tasks, without worrying about a compromise to the resource locks.
Applying Resource Locks
Now that we understand how they work and the common ‘gotchas’ regarding them, let’s explore how we can apply these.
Azure Portal
Within the Azure Portal, if we wish to deploy a resource lock to a resource or a resource group, we navigate to the resource/resource group as appropriate, and within it, we’d choose ‘Settings > Locks’.
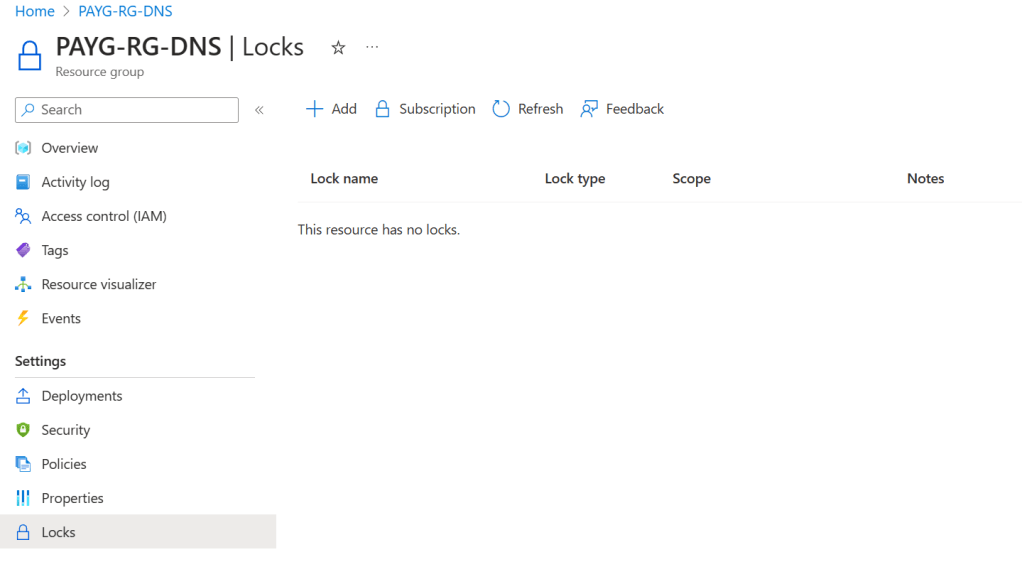
Once in this location, we can choose the Add option, provide a lock name, lock type, and any notes. I commonly use notes as my justification as to why the lock exists, but this field is optional.

The only difference when working with subscriptions is that you navigate to ‘Settings > Resource locks’.
Azure CLI
Depending on whether you’d like to assign a resource, resource group, or subscription lock, you’ll want to perform one of the following commands. Remember that the lock types within Azure CLI are ‘CanNotDelete’ for Delete Locks, or ‘ReadOnly’ for Read Only Locks.
Resource
Easily the most complex of these three scopes of the resource-level locks, especially if you’re not familiar with Microsoft’s resource types, as you must specify the type of the resource you’re attempting to lock, in addition to its name.
az lock create --name NameofLock --resource-group ResourceGroupName --resource-name ResourceName --resource-type microsoft.resource/type --lock-type CanNotDelete --subscription NameorIDofSubscriptionIf you require a list of all the resource types, please find Microsoft’s resource type list here. Alternatively, you can interrogate this via the following command:
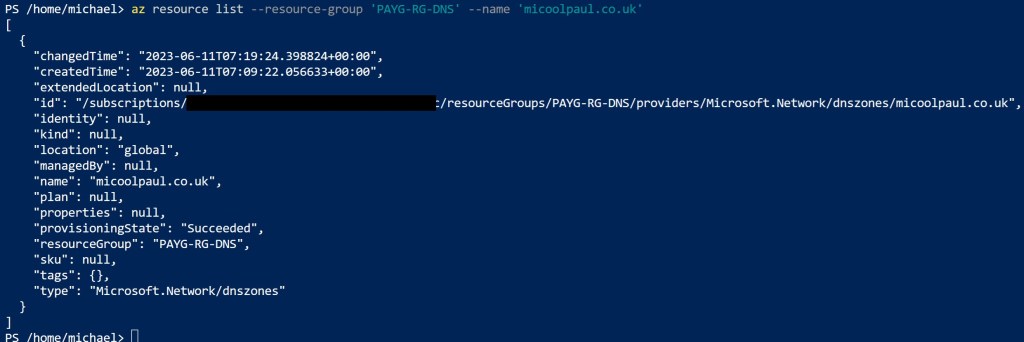
az resource listThis is something you can filter down by leveraging some of the parameters referenced within Microsoft’s documentation, such as the below. When reviewing the results, you’ll want to look for the ‘type’ value.
az resource list --resource-group ResourceGroup --name ResourceName --Subscription NameorIDofSubscriptionExample output below:
Resource Group
To create a resource group-level lock is simpler than a resource-level lock. We don’t need to specify any resource types or resources, just the name of the resource group still.
az lock create --name NameofLock --resource-group ResourceGroupName --lock-type CanNotDelete --subscription NameorIDofSubscriptionSubscription
Creating a subscription-level lock doesn’t require much input, however you should ensure you’re working within the correct subscription, otherwise you’ll get unexpected results, so be sure to use the global parameter ‘subscription’ as per my example below.
az lock create --name NameofLock --lock-type CanNotDelete --subscription NameorIDofSubscriptionFinding Existing Locks
You can leverage the following command to see all the locks within your current subscription.
az lock list --subscription NameorIDofSubscriptionYou can also add additional parameters to narrow the scope of your results such as this one to get resource group locks:
az lock list --resource-group ResourceGroup --subscription NameorIDofSubscriptionOr this one to get resource level locks:
az lock list --resource-group ResourceGroup --resource-name Resource --subscription NameorIDofSubscriptionDeleting Locks
Finally, to delete a lock the formatting is similar to how we’ve created or listed existing locks.
To delete a subscription-level lock, run the following command:
az lock delete --name LockName --subscription NameorIDofSubscriptionTo delete a resource group-level lock, run the following command:
az lock delete --name LockName --resource-group ResourceGroup --subscription NameorIDofSubscriptionLastly, to delete a resource-level lock, run the following command:
az lock delete --name LockName --resource-group ResourceGroup --resource ResourceName --resource-type microsoft.resource/type --subscription NameorIDofSubscriptionDiscovering Resource Lock Modifications
We come to arguably the most important part of this blog post. It’s all good and well creating these resource locks, but if they can be removed without our knowledge, how can we be sure they’re providing us with any meaningful protection?
To gain visibility, we’re going to leverage the alert functionality within Azure Monitor. This will take up two phases, the creation of alert rules, and the creation of an action group. And of course, we’ll look at how we do this via Azure Portal, and Azure CLI.
Action Groups
Azure Portal
Let’s start by creating an alert rule. To do so. From the Azure Portal home screen, open Azure Monitor, then navigate to ‘Alerts’ and choose ‘Create > Action Group’.
We’ll have five tabs to work through here, the first one is called ‘Basics’. Within this we’ll specify our preferred subscription, and either use an existing, or create a new resource group. Optionally you can define a region, I’ll keep mine with ‘Global’ however, Microsoft include this to allow for data residency restriction compliance, to provide assurance that any processed data and alerts are processed within specific regions only. And finally, we choose the Action Group name, and its display name. The one we care about the most is the display name, if we generate text messages or emails, this name will be used to state which action group this message has been triggered from, so ensure it makes sense!
Next, we have the option to choose our notification type, if you’ve configured the primary email addresses for each Azure AD user account, you can specify an Azure Resource Manager Role such as Owner/Contributor to be emailed the alerts.
Alternatively, or additionally, you can also choose the “Email/SMS message/Push/Voice” option, to deliver notifications via any of those mechanisms. I would typically use email, and potentially the Azure mobile app notification. To configure any of these, tick the box(es) you want, and input the details such as email/phone number etc. You’ll also have the option to choose to enable a common alert schema. Choices for schemas will help depending on how you wish to consume your alerts. I want to have emails that I can investigate, rather than an automated processing of a message, so it doesn’t matter to me, but this might impact you.
Next, we have the option to configure any actions that we wish to have performed when the action group is triggered. I don’t in this case, but again, you might choose to leverage any integrations with ticketing systems or other such pipelines, but I don’t need to do this.
Then we choose to optionally allocate any tags, and finally review & create!
Azure CLI
Creating an action group is a single command, and it doesn’t have many parameters, but there’s a lot of customisation available behind this apparent simplicity, so let’s explore it below!
az monitor action-group create --name 'ActionGroupName' --resource-group 'ResourceGroup' --short-name 'AGSName' --action email emaillabel email@address.tld --action azureapppush pushaccountuser upn@address.tldWhen creating an action-group we have to specify the following parameters:
- –Name: This is the name you will give the Action Group
- –Resource-Group: This is the name of the resource group to which the action group resource will reside within
- –Short-Name: This is a 12 character or less short name to refer to the Action Group
- –Action: There are a wealth of parameters available for this so the first thing I suggest you do is use the –help parameter instead to get a useful output of options. I typically use –action email and –action azureapppush, to generate emails and azureapppush notifications respectively, but other options are SMS, webhook, Azure Resource Manager roles, ITSM, Automation runbooks, Voice calls, Logic Apps, and Azure Functions. The format for utilising these is the same throughout. It’s –action <action type> <name> <configuration>. So, in my example above we see –action email ‘EmailLabel’ email@address.tld. We’re saying to add an action type of email, call it ‘EmailLabel’ and the email address to notify is email@address.tld. You can also add multiple –action’s within a single command, as per the example above.
- –Location: As mentioned earlier, if you wish to define a zone to which this belongs.
- –Subscription: Don’t forget, if you haven’t set your subscription context, you’ll need to specify the subscription to which your resource/resource group belongs.
With these parameters in place, our action group can now be used by our alert rules that we’ll now move onto creating.
Alert Rules
Azure Portal
Now let’s create an alert rule. To do so. From the Azure Portal home screen, open Azure Monitor, then navigate to ‘Alerts’ and choose ‘Create > Alert Rule’.
We’ll be taken through six tabs, starting with Scope. This relates to where we want to monitor for unexpected/unwanted behaviour. We can specify at a Subscription level, Resource Group level, or a Resource level. If we choose Subscription or Resource Group, we can also perform filtering only for specific locations or resource types. As we want to monitor for tampering with our resource locks however, l suggest you monitor at the subscription level.
Next, we are asked what conditions we’re looking for, and we have to specify a signal. The rule we want to create requires us to select ‘See all signals’, then navigate to the ‘Activity Log’ section, and search for ‘Delete Management Locks’. We can ignore the rest of the options on screen and proceed to the ‘Actions’ table.
Here we choose our action group(s) that’ we created in the previous section. If you skipped over the previous section, you can create new action groups from here. You can add custom properties at this point, this would be useful if you wish to provide any automation parameters based on your integration pipelines.
On the details tab, we’re asked which resource group we’d like to save this alert rule to. We then choose to give it a name, and optionally, a description. Under the advanced options we have a default checked box that states, ‘Enable alert rule upon creation’, we can disable this rule here if we wish.
As always, we are then presented with the ability to allocate any tags, then review and create our alert rule.
Azure CLI
To create an alert rule within Azure CLI is a more complex, multi-command process, which we’ll explore. We’ll explore each command individually and any parameters required below:
az monitor activity-log alert create --name 'AlertName' --resource-group 'ResourceGroup' --condition category=Administrative and operationName=Microsoft.Authorization/locks/delete --scope /subscriptions/SubscriptionIDFirstly, we need to create our alert. We want to use an activity-log signal for our alerts, so that’s why we have the ‘activity-log’ section of our command. We’ll use the ‘–name’ parameter to give the alert a name, the ‘–resource-group’ parameter to specify the resource group to which the alert will belong, the ‘–condition’ parameter to find the category and operation name we are looking to alert against, and the ‘–scope’ parameter to specify any subscriptions, or resource groups, or resources that we wish to filter checking for alerts against, this parameter accepts a list of strings should you require multiple inputs, space separated.
az monitor activity-log alert scope addThe scope add command is only necessary if you need to add additional scopes to your rule, either initially or in the future as part of lifecycle management.
az monitor activity-log alert action-group add Once our alert is created, we can add a relationship to one or more action-groups using the command above, enabling us to deliver the alerts we’re seeking.
Additional Alert Rules
Whilst it’s great to get a notification that the resource lock has been removed, I like to introduce additional advanced warnings too. If I was working with an extremely important workloads, such as an Azure Storage Account for my backups, I would want to create an alert that notified me that a deletion attempt had been performed against my Azure Storage Account. If you’ve followed the instructions above and created resource locks, the deletion attempt would fail. If this was a malicious attack, the likely next step would be to delete the resource lock, to perform the deletion. If you created an Alert Rule to notify you of any storage account deletion attempts, you can get advanced warning that something was attempted that shouldn’t be, and can begin investing, ideally before the resource lock has been removed. All you need to do to enable this is follow my ‘Alert Rule’ creation steps above but substitute the signal for ‘Delete Storage Account’.
You might be thinking at this point ‘well if I delete the alert rule, then this could all be done without raising alarm’. And you’re right, so I’d like to suggest some additional rules to be added.
Delete Alert Rules
Firstly, create another alert rule with the signal ‘Delete Alert Rules’. If you implement a resource lock on this rule, you create a trap for any deletion attempts. Consider these scenarios:
- If you delete the ‘Delete Management Locks’ alert, you trigger the rule for deleting alert rules.
- If you attempt to delete the ‘Delete Alert Rules’ alert rule, you’ll trigger the ‘Delete Alert Rules’ alert rule because the attempt fails due to the resource lock.
- If you first attempt to remove the resource lock on the ‘Delete Alerts Rules’ alert rule, you trigger the ‘Delete Management Locks’ alert rule.
- If you also ensure a resource lock is added to the ‘Delete Management Locks’ alert, you trigger the rule before the rule can be deleted as you need to remove the management lock first.
Delete Alert Rule Response Actions
Just as bad as deleting the entire rule would be deletion of the response actions, which are the notifications to you and your team. Be sure to capture this one. The signal is called ‘Delete Alert Rule Response Actions (Alert Rules Actions).
Update Alert Rules
We wish to avoid changes to any alert rules going unnoticed, so adding a signal for ‘Update Alert Rules (Alert Rules)’ allows us to capture when changes are being made or attempted.
Update Alert Rule Response Actions
Likewise, we don’t want any changes to our alert rule responses, such as the removal of our intended notification recipients. Use the signal ‘Update Alert Rule Response Actions’ to capture this.
Create or Update Action Group
The next rule we’ll create is to notify us whenever we create or update an action group. This is important as otherwise someone seeking to circumvent your monitoring could look to remove the notification targets prior to triggering the alerts, requiring another method of looking into the triggered alerts to notice a problem, by which point it might be too late. The signal to look for is called ‘Create or update action group (Action Groups)’.
Delete Action Group
No surprises here, we also don’t want our action group to be deleted. The signal for this is called ‘Delete Action Group’.
Conclusion
I would like to close by saying that all of these scenarios are designed to generate visibility of an accidental or intentional change to your environment that is potentially unwanted. Prevention is better than cure, so this should be considered a complement to your overall security posture alongside provisioning robust security measures such as least-privilege role-based access controls, multi-factor authentication, conditional access, and Privileged Identity Management, to name a few options.
Furthermore, whilst I leveraged out-of-the-box notification triggers within Azure Monitor, the tool is much more powerful, and you could create pipelines to lock out accounts performing prohibited tasks for example, to contain any unexpected behaviours until they’ve been sufficiently investigated.

Leave a comment