
I had an interesting issue over the past week that stumped Microsoft Support for a while. A customer of mine had created a user but accidentally left a trailing space after their UPN. When the user had synchronised to AzureAD with this attribute and their Microsoft 365 licensing had deployed, this created a SIPProxyAddress with this trailing space.
Whilst most of the attributes were automatically corrected once the account had been corrected and AD had synchronized, unfortunately Microsoft Teams kept this incorrect SIPProxyAddress.
Microsoft’s initial instruction for this would be to amend the msRTCSIP-PrimaryUserAddress attribute within AD, however this customer had never used OCS/Lync/Skype for Business, so they didn’t have this within their AD schema. Any attempts to make changes to this via the Microsoft Teams PowerShell cmdlet Set-CsUser would result in the following error.
Unable to set "SipAddress". This parameter is restricted within Remote Tenant PowerShell.This is expected! If your users are being synchronized from Active Directory, Azure AD doesn’t want to create conflicts.
Working with Microsoft, they suggested many things, such as trying to change the proxy address attributes to include a “sip:xxxx@customer.domain” record, or setting attributes via Exchange Online but nothing changes this SIP Address once it has been created.
There are two key steps that can help you resolve this issue promptly.
Firstly try running the following command from a Microsoft Teams PowerShell session:
Get-CsOnlineUser "User name" | fl userprincipalname, sipaddress, sipproxyaddress, email, proxyaddresses, windowsemailaddress, interpretedusertype, mcovalidationerrorYou’ll then get an output similar to the below.
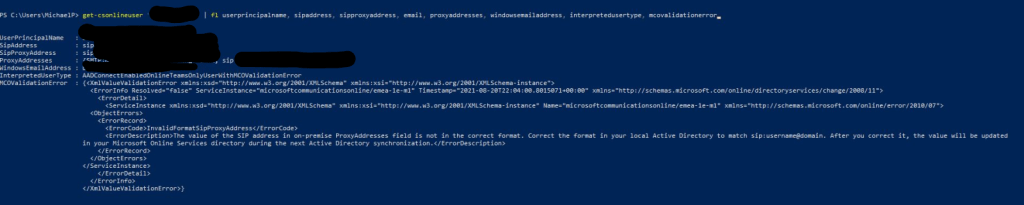
This will provide you with two key insights, firstly you’ll get a list of any validation errors that Microsoft have with your account information, such as here, it doesn’t like the trailing space and is informing us the ProxyAddresses field is not in the correct format. Secondly this will provide you with all of your attributes to help you find out at a glance where your errors are.
The error in the screenshot isn’t actually right, as the ProxyAddresses it’s referring to didn’t come from AD, but they were actually generated by Azure AD/Microsoft Teams. However once you’ve fixed the rest of the errors and just need to change the SIPProxyAddress / ProxyAddresses fields, all you’ll need to do is remove the Microsoft Teams and supporting licenses/apps from the user account, wait half hour and then add them again.
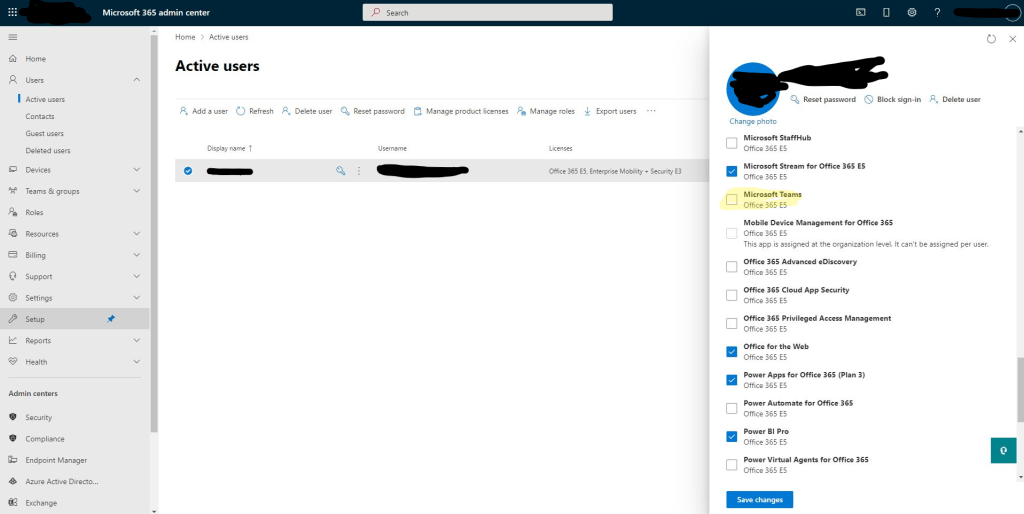
To do this, navigate to https://admin.microsoft.com, browse your active users and find the active user, then click on them, navigate to “Licenses and apps”, then under the app section you can disable specific services. I disabled Microsoft Teams, Phone System, Audio Conferencing and Skype for Business Online Plan 2. This is because we don’t want any dependencies of Microsoft Teams to remain as this could complicate the setup.
Once this is done, check your user account with the following command:
Get-CsOnlineUser -Identity "UPN@domain.name"At this point you’ll find most attributes have been cleared including your SIP Address attributes.
If this hasn’t changed yet, wait longer, Microsoft Teams can take a while to update all the configurations required. Once this has been reflected in the output of the command above, you’re ready to re-instate the licenses. To do this, return to the https://admin.microsoft.com website and check the apps you removed from the user. Then wait half hour and check the user account again with the last command listed, your SIP related attributes should now be correct! Finally check you have no further validation errors with your account as per:
Get-CsOnlineUser "User name" | fl userprincipalname, sipaddress, sipproxyaddress, email, proxyaddresses, windowsemailaddress, interpretedusertype, mcovalidationerrorThen your user should be good to go and Teams will allow you to make any further changes required to the account.

Hope this helped!

Leave a comment