
I’ve recently swapped ISPs and no longer have a static IP address, so I needed to make sure I had a way to access my lab when away from home, even if the IP address changes. I’m currently using a PfSense firewall and I’m using Azure DNS for my domain, so I wanted to explore if I could make these work.
Why am I using Azure DNS? Because Microsoft Azure guarantees that valid DNS requests receive a response from at least one Azure DNS name server 100% of the time. I also found it quite interesting that Azure use different TLDs between the nameservers, serving your domain, to make sure they’re truly diverse, this isn’t unique to Azure as AWS do this too with Route 53, but it’s certainly a nice feature to have, when I last used GCP I noticed they don’t do this, instead opting for every nameserver to be served from googledomains.com.
Configure Azure AD App Registration
To enable the DNS record we want to create to be updated, we’ll need an Azure AD App Registration, so let’s start here.
Connect to Azure and jump over to Azure Active Directory and select ‘App Registrations’, we’ll create a new registration here.
We’ll be asked for a User-facing display name, what account types should we permit accessing this app registration, and optionally supply a redirect URI.

To minimise misuse, I’ve configured my supported account type to only accounts within my Azure AD directory, unless you’re aware of a specific need to adjust this, I suggest you set the same.
Once the app registration has been created, navigate to ‘Certificates & Secrets’ within your app registration. We’re going to create a new client secret by clicking on the ‘Client Secrets’ tab and then selecting ‘New Client Secret’
For your new client secret, provide a description of its use such as ‘PfSense Authentication’ and set the expiry to whatever suits your needs best. I don’t want to constantly change my client secret, so I’ve set it to the maximum length which is two years.
Once you’ve confirmed this, you’ll see a new entry within the Client Secrets section, showing four columns, ‘Description’, ‘Expires’, ‘Value’, and ‘Secret ID’. You’ll require the value field later, so take a copy of this now.

Before we move onto configuring DNS, we’ll also require the Application (client ID), so navigate to the overview section of the app registration and take a copy of this GUID.
Configuring Azure DNS
Now we need to configure our DNS record that we’re going to use for our Dynamic DNS process.
Creating the DNS Record
Connect to Azure and find your DNS Zone, create a new ‘A Record’ Record Set, and specify the TTL for the record you want, this should be a lower value as if your IP address changes, you don’t want to be stuck with an out-of-date IP address being resolved to. I’ve opted for 1 hour. You can create this without an entry, so let’s save and close.

Configuring Access Control (IAM)
With our DNS record & App Registration created, we’ll now permit access for our App Registration to our DNS record, remaining within your DNS Zone, choose the ‘Access Control (IAM)’ option, then select Add, and then select ‘Add Role Assignment’.
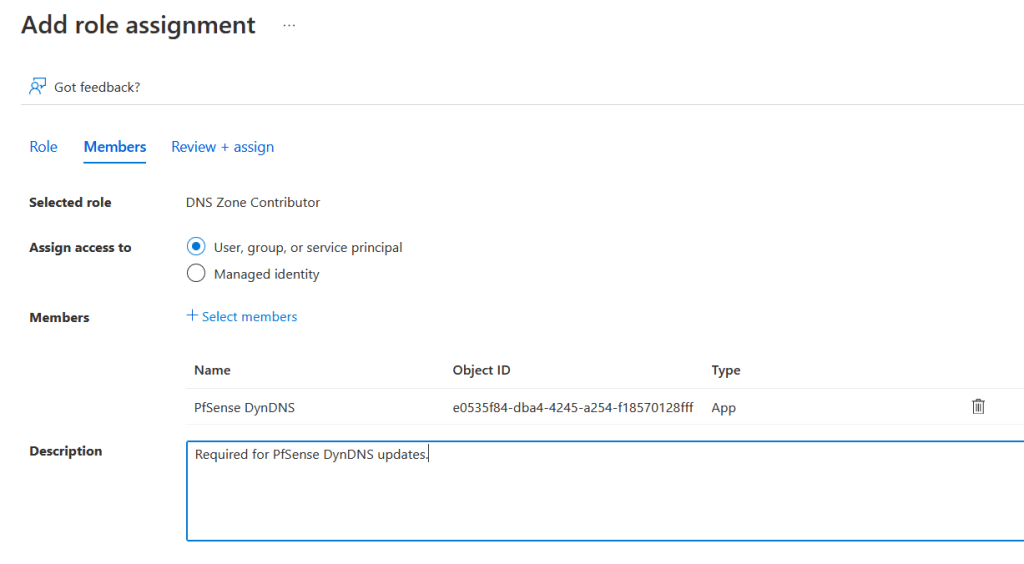
At this point we choose the role that we want, we’ll choose ‘DNS Zone Contributor’, as this gives us the ability to manage DNS Zones, but not manage the access control for them, click next.
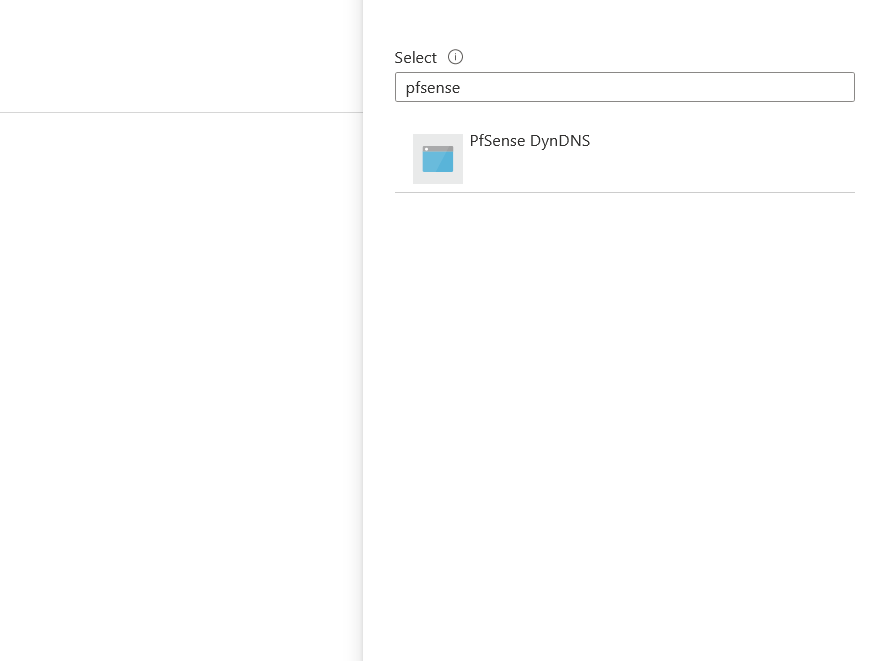
Under the members step, we’ll be asked who or what we want to assign the selected role of ‘DNS Zone Contributor’ to. We’ll choose to assign to a ‘User, group, or service principal’, then click the ‘+ Select Members’ option, by default the search results will show users & groups within your organisation, but you can use the search box to type in the name of your app registration.
Once confirmed, add a description if required and then select ‘Review + assign’.
Confirm everything is configured as necessary and then confirm this to create the assignment.
We’re about to configure our PfSense now, so take note of the following values ready for configuration:
Your hostname, your TTL, and the DNS Zone’s Resource ID, which can be found under the properties section of your DNS Zone.
Configuring the PfSense Firewall
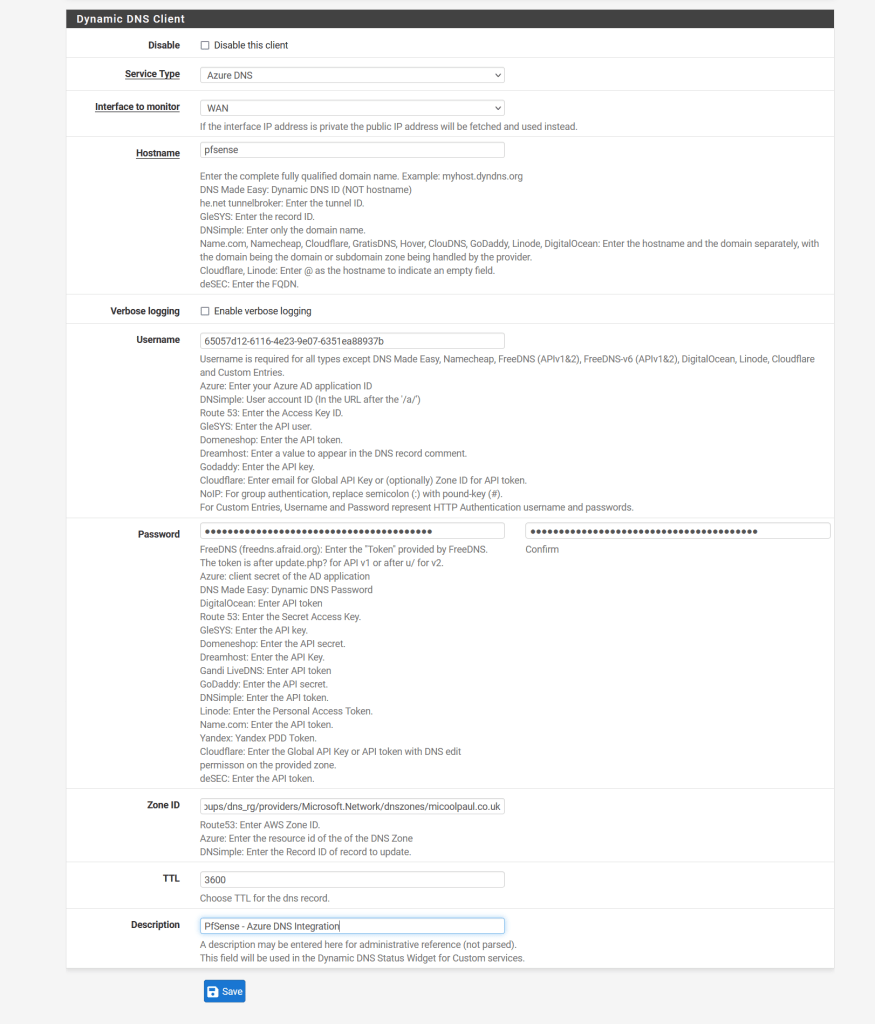
Log into your PfSense firewall and then under the services section, choose Dynamic DNS. Under the ‘Dynamic DNS Clients’ section, click Add, and populate as below.
- Disable: Leave this checkbox unchecked so this configuration is enabled.
- Service Type: Set to Azure DNS.
- Interface to monitor: Set this to your WAN interface as appropriate, I only have one uplink so this is ‘WAN’ for me.
- Hostname: Only input the subdomain element, in my example it is ‘PfSense’, if you input the FQDN, this will be added as a new DNS record instead, and your DNS record will be <subdomain>.<domain>.<tld>.<domain>.<tld>. Nobody wants this!
- Verbose logging: Leave unchecked unless you’re having troubles.
- Username: Input your Azure AD App Registration ID here.
- Password: Input your client secret for your Azure AD App Registration here, be sure to also input it into the password confirmation box too.
- Zone ID: This is the resource ID for the DNS Zone we grabbed in the previous section.
- TTL: This is your desired TTL, as I was using 1 hour, this would be 3600, as a TTL is measured in seconds, so 3600 seconds = 1 hour.
- Description: Add as appropriate.
See below for guidance:
Once this is completed, hit save, this might take a minute or two to process. Once all is done, if you’ve followed the instructions successfully, you’ll see an output like the below, whereby there’s a tick under the status column next to the line entry and the ‘Cached IP’ column shows your IP address.

Closing Notes
I hope that this has helped, and I suggest you create a reminder around the time that your client secret is due to expire, so you can create a new one in time, potentially linking back to this blog post as well for reference.

Leave a comment