Posted On:

Last Updated:

Personal Project: Ubuntu 20.04 LTS on Apple Macbook Pro 2011 with Failed AMD GPU


This is just a personal note of what I did to get my Macbook Pro Late 2011 with failed/failing AMD GPU to boot Ubuntu 20.04 LTS, hopefully it helps someone.

Prerequisites

You will need:

1x Macbook Pro (obviously!)

1x USB

1x Machine capable of creating a Live CD onto your USB of Ubuntu

Overview:

Did you know that the 2011 MacBook Pro has two graphics cards, the dedicated GPU (dGPU) and the integrated GPU (iGPU). These are both wired to the screen via a chip commonly referred to as the gmux chip. This chip allows for the operating system to tell the gmux chip which GPU is required for the workload, iGPU for best battery life, or dGPU for performance. We can exploit this by forcing the gmux chip to only use the iGPU and even tell it to power down the dGPU. This will help extend the life of our MacBook Pro by preventing the AMD GPU being powered on for longer than the boot sequence, and therefore prolong the time until failure.

Why does the GPU fail? Macrumours did a write up discussing this in more detail, especially in relation to the repair program but in essence, the AMD GPUs have design defects, and over time & use, causes them to fail at a much faster rate than other GPUs on the market. Apple did launch a repair program however they merely swapped the logic boards with identical ones, meaning the problem was only delayed, never resolved.

With that in mind, let’s now work to circumvent the dGPU!

Step One: Prepping the Live CD

I went to the Ubuntu website and downloaded the latest Ubuntu 20.04 LTS ISO. I then proceeded to use the handy tool Rufus to image my USB drive with this. Rufus has an awesome FAQ section that can answer any questions with using the tool.

Step Two: Installing Ubuntu

This is easier said than done but when booting the Mac, I first plugged in the USB and then I held down Alt, getting the boot options. I proceeded to boot the EFI boot.

I found many guides telling me to enter the grub menu, but unless you’ve already got a working rEFInd installation, you’re going to struggle. Instead I just proceeded to boot, as my GPU still partially works for incredibly short periods of time. I found it helpful to also utilise this GitHub project to disable my dGPU within the UEFI at boot.

When installing Ubuntu, I opted for the minimal install (for the minimal install time running on this wonky GPU), but I did choose to install proprietary drivers (this is required for Wi-Fi to work). As Ubuntu utilises a very informative installer, demonstrating all of the awesome programs and features, but this triggered my dGPU to fail on my first install, so I opted to minimise the installer to prevent any additional load/runtime on my failing dGPU.

Step Three: Making Ubuntu ignore the dGPU

When I rebooted the Macbook, the boot process worked and then I was greeted with a full purple screen, however, Ubuntu was actually still working perfectly. I then pressed Ctrl + Alt + F3 and was greated with the console output. This is where we can get Ubuntu to ignore the dGPU and use our working integrated one!

We’ve got three tasks to complete.

Task One: Updating GRUB

We need to amend the grub to leverage the integrated GPU, to do this we first run:

sudo nano /etc/default/grub

Then we can amend the output to look like this (thanks to this blog post):

GRUB_DEFAULT=0
GRUB_TIMEOUT_STYLE=hidden
GRUB_TIMEOUT=0
GRUB_DISTRIBUTOR=`lsb_release -i -s 2> /dev/null || echo Debian`
GRUB_CMDLINE_LINUX_DEFAULT="quiet splash radeon.modeset=0 i915.lvds_channel_mode=2 i915.modeset=1"
GRUB_CMDLINE_LINUX=""

Task Two: Power off the dGPU

We need to amend another grub file to power off the dGPU now, to edit this file we’ll run:
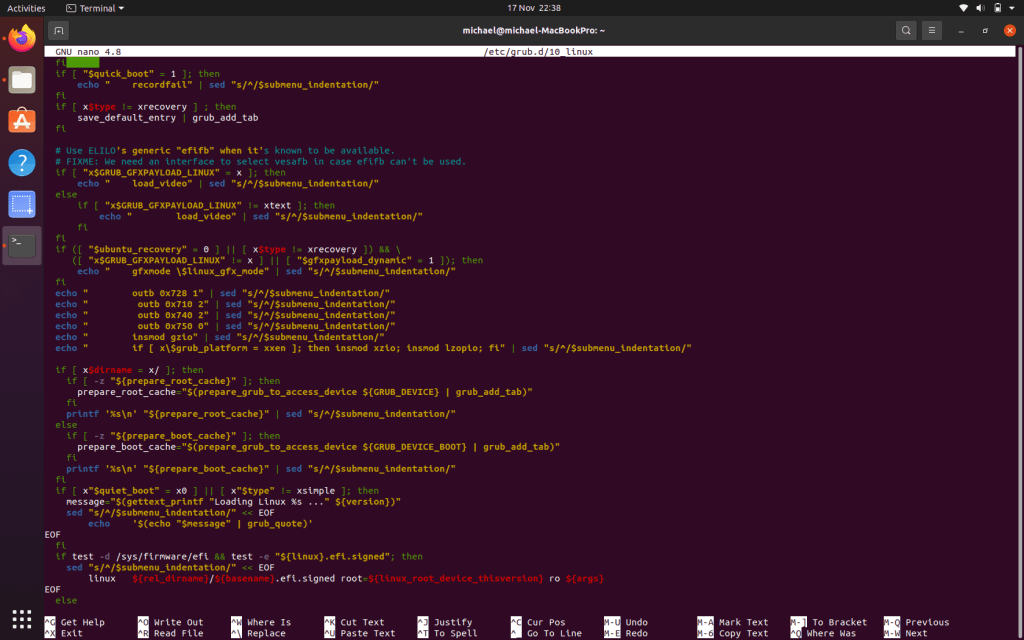
sudo nano /etc/grub.d/10_linux

We’ll then press Ctrl + W to search for the phrase “gzio”, we then need to insert some additional configuration prior to this phrase, making it look like the below:

echo "        outb 0x728 1" | sed "s/^/$submenu_indentation/"
echo "          outb 0x710 2" | sed "s/^/$submenu_indentation/"
echo "          outb 0x740 2" | sed "s/^/$submenu_indentation/"
echo "          outb 0x750 0" | sed "s/^/$submenu_indentation/"
echo "        insmod gzio" | sed "s/^/$submenu_indentation/"

Again thanks to the blog post I linked to earlier it forces the discrete graphics card to completely power down. I’ve heard of people reporting this not persisting with suspend/resumes, but I’ve not encountered this myself.

Task Three: Update your GRUB

This one is simple, now our files are all edited, just run the below command!

sudo update-grub

Bonus: How to confirm your dGPU isn’t being used

To see the devices connected to your system you can run the following command from terminal:

lspci -vnnn | grep VGA

If all went well you should only see your Intel GPU now!

That’s certainly not the easiest command to remember now, so I like to create aliases to remember these specific scenarios I’ll need to check occasionally. So I created an alias, in Ubuntu you can make a persistent alias by doing the following:

nano ~/.bashrc

And then append this to the end of the file:

alias gmuxcheck='lspci -vnn | grep VGA'
Your file should now look like this!

This means I can now just type “gmuxcheck” into the terminal and see if the AMD GPU has re-appeared. Why did I call it gmuxcheck? Because Apple included a chip commonly called “gmux” that connects both GPUs to the display via the gmux chip. The gmux chip is responsible for which GPU performs the rendering, based on what the OS says is necessary. So all of those parameters we set earlier were actually programming the gmux to not use the AMD GPU in any scenario! If you don’t like that name, change the alias to whatever suits you best. You’ll know your Intel GPU is the workhorse as you’ll only see it when you run it, like the screenshot below.

No sign of the AMD GPU!

25 responses to “Personal Project: Ubuntu 20.04 LTS on Apple Macbook Pro 2011 with Failed AMD GPU”

  1. hi, thanks for your hacks. now, how to make MiniDP/Thunderbolt works? my Ubuntu didn’t recognized my Thunderbolt.

    Like

  2. hi, thanks for your hacks. but, i have a problem. how to make miniDP / Thunderbolt works in Ubuntu 20.04. i want to add an extended monitor.

    Like

    1. Hi, the Thunderbolt (mini DP) port is wired to the AMD GPU, unfortunately there’s no way of using it once the GPU is disabled. Depending on screen resolution required you could use a USB HUB but as the MBP only has USB 2.0 ports you’d be looking at a screen resolution of 800×600. I’ve seen some people tweak the settings differently to keep the AMD GPU enabled but I haven’t included it in my blog post as the GPU can still make your whole system crash even when it’s not the active video output.

      Unfortunately, unless you pay for one of the eBay services I’ve seen where you can get a newer generation of the AMD GPU soldered on that doesn’t have the defect, you’re pretty stuck. Let’s be honest, the laptop is 10+ years old now, this is the best life support it’s gonna get!

      Like

  3. Thanks for the instruction and my old Macbook pro has just reborn!!

    Liked by 1 person

  4. Oh my god this was literally a godsend of the highest proportions. I spent 3 months trying to get my MacBook Pro 2011 17” to work with a display manager on and off like seriously helpful man thank you so much.

    Like

    1. I don’t know the ‘LikeLike’ got stuck on the end ignore that lol.

      Like

      1. Nevermind it seems to have dissapeared.

        Like

  5. Stanislav Kalashnikov Avatar
    Stanislav Kalashnikov

    Hi! I’ve just install an Ubuntu 18 on my MBP15 2011 and can’t understand how to use microphone built-in my headphones. When it runs macOS Mojave (patched) it works with my headphones microphone, but now I’m stuck on that and don’t know how to make it works. The same thing with Wi-Fi module. If you have an idea about to solve those problems let me know, please! Thanks!

    Like

    1. Hi, I didn’t have these problems with Ubuntu 20.04 LTS, and as 18.04LTS is EOL this/next month I’d suggest using that one instead.

      Like

      1. Stanislav Kalashnikov Avatar
        Stanislav Kalashnikov

        Thanks for quick answer! I’ll try this and reply if something changes

        Like

      2. Stanislav Kalashnikov Avatar
        Stanislav Kalashnikov

        Here we go! I’ve install Ubuntu 20 today and it runs perfect, but headphone’s microphone still doesn’t work. I’ll try to install sound packages in Ubuntu, but if you’ll find a solution please tag me by the way. Although it’s not so terrible after update to 20 because it runs with no noise a stay more cool when I use video calls unlike an 18 version. Thanks for your advice!

        Like

  6. BRILLIANT!!!!!!! THANK YOU AND THANK YOU AGAIN. I installed Ubuntu 22.04 on an old mbp 2011 and really didnt like the fact that it would only work with nomodeset (couldnt stand the graphics etc). Found your article, followed step by step and when I rebooted, I honestly didnt expect much but I was blown away!!! crisp display and good colors finally!!! thanks!!!!

    Like

  7. I recently installed Ubuntu 22.10.2 onto my Macbook Pro 17 (late 2011) and it works nearly flawlessly, breathing new life into this aging but quite capable laptop! The nearly part is the screen resolution, which is currently set to 1440×900 (max resolution). Since I know this screen is capable of 1920×1200, I’m trying to figure out how to get there and wondering if it has anything to do with the dGPU or maybe the display driver used by Ubuntu.

    I have already tried adding a new resolution using cvt/xrandr but that seems to push the resolution higher than the screen viewable area.

    My search continues…

    Like

    1. Hi, have you reviewed your aspect ratio? That could be hiding it. 1920×1080 is 16:9 but 1440×900 is 16:10.

      Like

      1. Since the native resolution of the display is 1920×1200 (16:10), that’s what I’ve been aiming for. I’ve tried it as well as 1920×1080 (16:9). Both give the same results of having a screen area larger than the viewable area.

        I came across your blog here and wondered if the issue I’m seeing is a result of the two video subsystems. Is it contributing to the issue? This seems like a driver issue though if the driver thinks the display is capable of a max 1440×900 (16:10) resolution.

        Like

      2. The maximum resolution for the Intel HD 3000 is more than 1920×1200 so that’s fine, the imux chip changes the video input between GPUs but they both needed to be able to handle native screen resolution. Whereas the Thunderbolt port was exclusively wired to the dedicated GPU hence that could push higher resolution. Make sure you’ve got your drivers sorted and I can’t think why that wouldn’t work. I’ve got the 15” but I could get that to work at native resolution for me.

        Like

  8. Ah, that’s a key piece of information I neglected to include. The display in question is the builtin display of the laptop. I haven’t even tried to connect another display since that’s not the normal way I’ll use this laptop. As for the current drivers, they are what comes with the distribution. If there are specific drivers for this display, I haven’t found them yet, but I’m still looking. Thanks for your input on this issue.

    Like

  9. Mahnfried Honke Avatar
    Mahnfried Honke

    Hi @MicoolPaul,

    I finished the installation of ubuntu 22.04.2 LTS but the reboot freezes already in the first seconds of the loading screen. any idea how to get around there?

    Like

    1. That’s likely your GPU failing I’d assume, if you can boot in command-line only to do what you need to that’d likely help. I’ve not upgraded to 22.04 so I can’t comment on specifics unfortunately

      Like

      1. Mahnfried Honke Avatar
        Mahnfried Honke

        got access by choosing the xorg server at the login page 🙂

        only difference was that i had to set the GRUB_DISABLE_OS_PROBER=false (standard is auto) before updating grub (dont forget to switch it back to auto again afterwards)

        thx a lot for your work!

        Like

      2. Thanks for sharing your fix!

        Like

  10. Hi,
    I have a Macbook Pro 8,2 with broken AMD gpu with Ventura MacOS installed using opencore. Ventura works just fine except it is pretty demanding and fans are on most of the time.
    I followed your tutorial and installed Ubuntu Studio (kubuntu with some extras). Everything works with one exception – when testing dGPU using lspci -vnnn | grep VGA it reports both GPUs in use. Does this mean dGPU is still activated?
    During grub start there is an error message “no video mode activated”, and something mentiones “hwmatch”, but ubuntu boots with no problems.

    Like

    1. Hi, correct if you see both GPUs then you’ve still got your dGPU activated, you’ll need to run through the steps again unfortunately

      Like

      1. I did manage to deactivate it by enabling grub menu selection and edit first menu option (press e), and manually entering outb 0x728 1
        outb 0x710 2
        outb 0x740 2
        outb 0x750 0
        above insmod gzio.
        Now theres no more AMD gpu activated when I check.

        Like

      2. Perfect! That’s what you want to see 🙂

        Like

Leave a comment

This site uses Akismet to reduce spam. Learn how your comment data is processed.